
The Publication Portal
- An internal portal where project members with publishing rights select which files are to be shared with whom. Inside your TSD-project, open the following link, in a browser: https://internal.publication.tsd.usit.no/
- An external portal where the selected files are available to the selected recipients.
Make files available with the Internal Publication Portal
The Internal Publication Portal is used to publish data and manage access for associated members of the project, and is accessed from inside of TSD. Notice that to use the internal publication portal you must:
- be regular user of your TSD project with a user account
- be a member of the publication-group of your project
You can to the main page by clicking on the header of the page: TSD Publication Portal.
Share files with individuals
To share files, add the recipients to the Associated member category in TSD's Selfserviceportal. Associated members do not need to log into TSD. Instead, they prove their identity via identity providers such as ID-porten. Existing TSD users can apply to become an associate member of another project team.
1: Uploading files for publication

- Select one or more files from your file browser.
- Drag and drop these files into the grey panel on the left-hand side of the screen. You can also click the Select file button at the bottom of the right-hand panel to select files.
- The progress of the upload process is displayed in the in the right-hand panel.
- You can select additional files while uploading. However, make sure that uploading your file(s) has finished before you proceed with publishing the files.
- Once the upload is finished, the status will change to Ready, and the table containing the list of Publishable files at the bottom of the screen will be updated.
- To cancel ongoing uploads and remove all remaining files from the upload queue, click the button called Cancel in the panel on the right-hand side.
The list of Publishable files contains the uploaded files that are ready for publishing. The table rows contain information such as the file name, file size, and the date when the file was uploaded. The Published column specifies how many associated members the file has been published for.
2: Publish files
 Once you click the Publish symbol of a file in the list of Publishable Files you will see a new screen displaying its publication status.
Click Publish file to make this file available to selected members of your project.

Selected members can download the files. Select one or more Unselected members in the left-hand panel and click the right-facing arrow (→) to make them Selected members. To remove recipients, select one or more Selected members and click the left-facing arrow (←).
Possible actions
- Display information
- Clicking the Information symbol displays further details about the file.
- Publish
- Clicking the Publish symbol makes the file available for download by associated members. It also shows which associated members the file has been published to.
- Delete
- Clicking the Delete symbol (×) deletes the uploaded file and all associated publications.
Specify metadata
You can specify the metadata of this publication in the form below the member selector:
- Description
- An optional description about the nature of the file, to inform recipients about the content.
- End date
- The file will be available to the recipient until this date.
- Usages
- The maximum number of times the file can be accessed by the recipient. If you leave this field empty, recipients may access the file as many times as they like.
Notice that the description, end date and number of usages will apply to the publications made for all recipients. Notice also that files will be kept as Publishable files even after they have expired due to the end date being exceeded, or due to the maximum numbers of usages being exceeded.
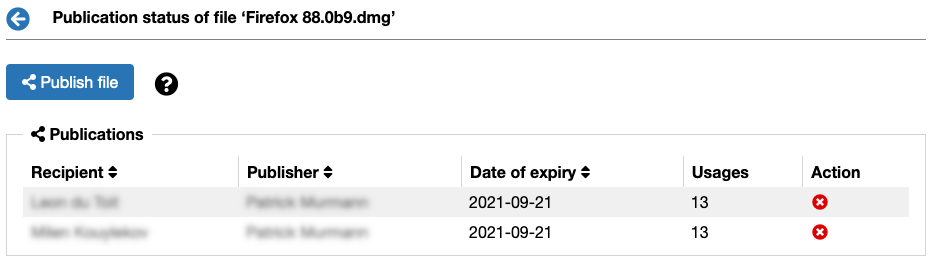
Publications table
The Publications table shows each file made available to one recipient. If you publish a file for more than one recipient, each of them will be treated as a separate publication.
- Recipient
- The member for whom the file was made available.
- Publisher
- The member who published the file.
- Date of expiry
- The file will be available to the recipient until this date.
- Usages
- The number of usages left for this publication. Each time the file is accessed, this number will decrease by one. Once it reaches zero, the file will not be accessible any more.
- Action
- Clicking the Delete symbol (×) removes the publication but keeps the underlying file. To erase the uploaded file itself, return to the previous screen and remove the file from the list of Publishable files.
The blue left-facing arrow (←) on the top left of the screen will take you back to the list of Publishable files.
Share files with groups
You can grant access to files owned by one group to the members of another group of your project.
There are two types of groups involved in the group management:
- Data owner group
- Denotes the group owning the data.
- Data user group
- Denotes the group that uses or will be using the data.

To grant the members of a data user group access to the files owned by a data owner group do the following:
- Select a data owner group from the left-hand panel of the Managable publication groups.
- Select a data user group from the right-hand panel of the Managable publication groups.
- Click the Plus symbol (+) to associate the two groups.
- Once you have confirmed, the pair of groups you have associated will appear in the table of Group-based access at the bottom of the screen.
To delete the association of a data owner and data user group, click the Delete symbol (×) on the right-hand side of the table row in question.