When you are going to use TSD, you must be linked to a project. You create your TSD user by applying for access to the project and identifying yourself through ID-porten, by means of bank ID on mobile or similar. For users that cannot identify themselves through ID-porten (users without Norwegian-ID) there is a separate procedure described below.
1. Software requirements for using TSD
VMware client
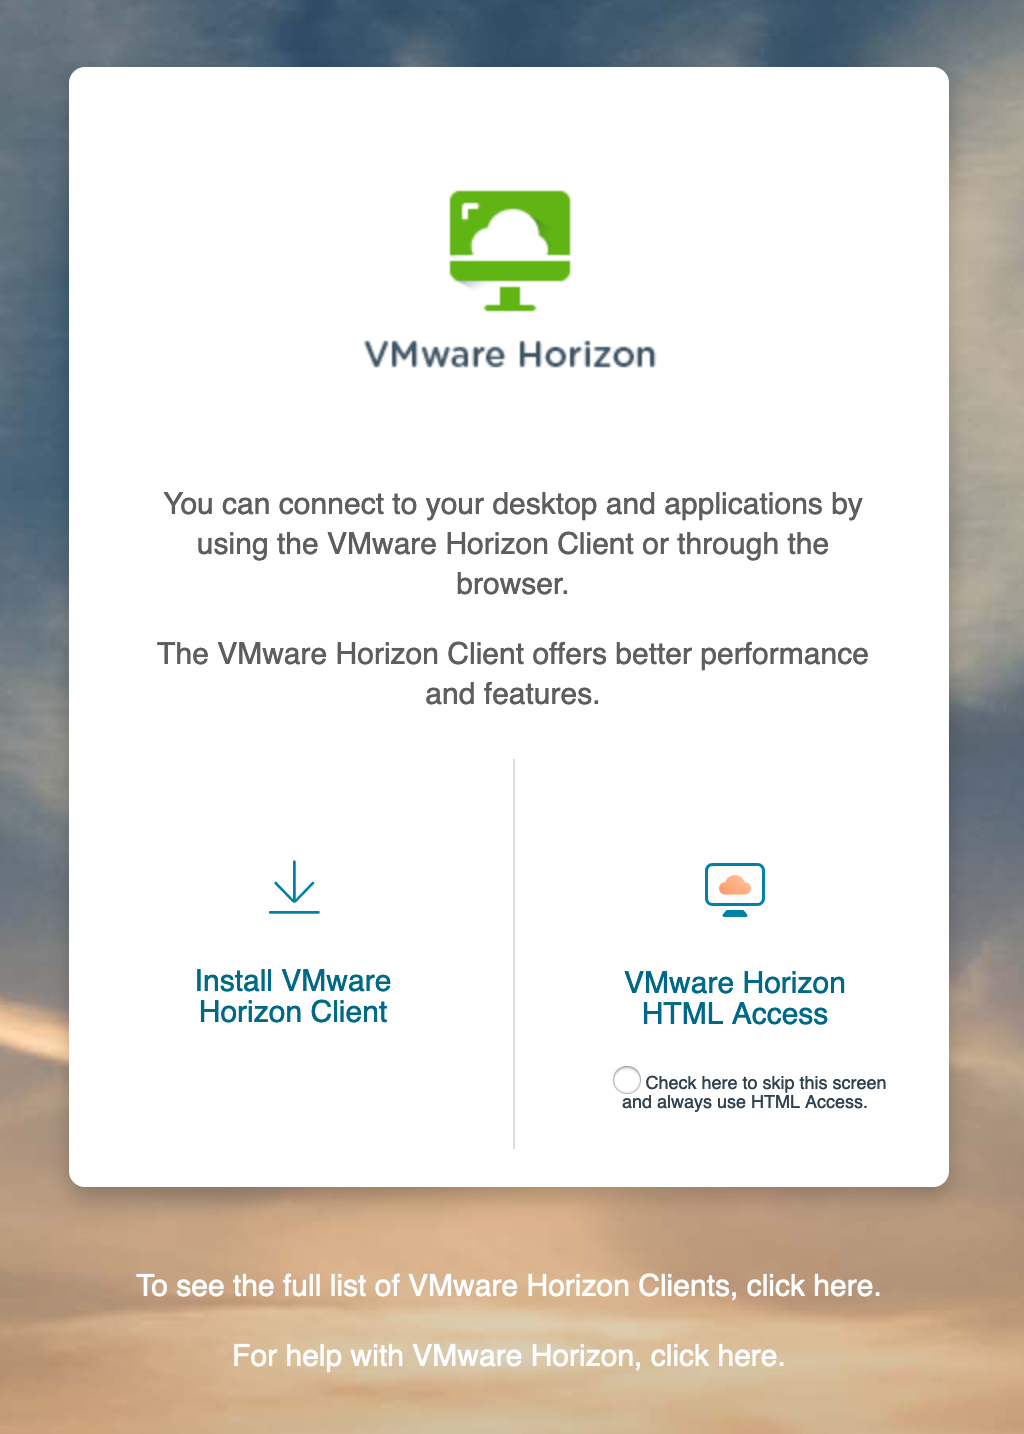
To use TSD, you can use the web client but it is highly recommended to install the VMWare Horizon client on your computer.
Note: there are known issues when using Linux in TSD with the web client:
- For Mac OS, the keyboard layout does not sync when working inside TSD.
- Performance is better with the VMware client installed.
Non-UiO computer
If you are not associated with the UiO, download and install VMware Horizon.
For Windows, Mac or Linux computers
- Go to https://view.tsd.usit.no.
- Choose Install VMware Horizon Client.
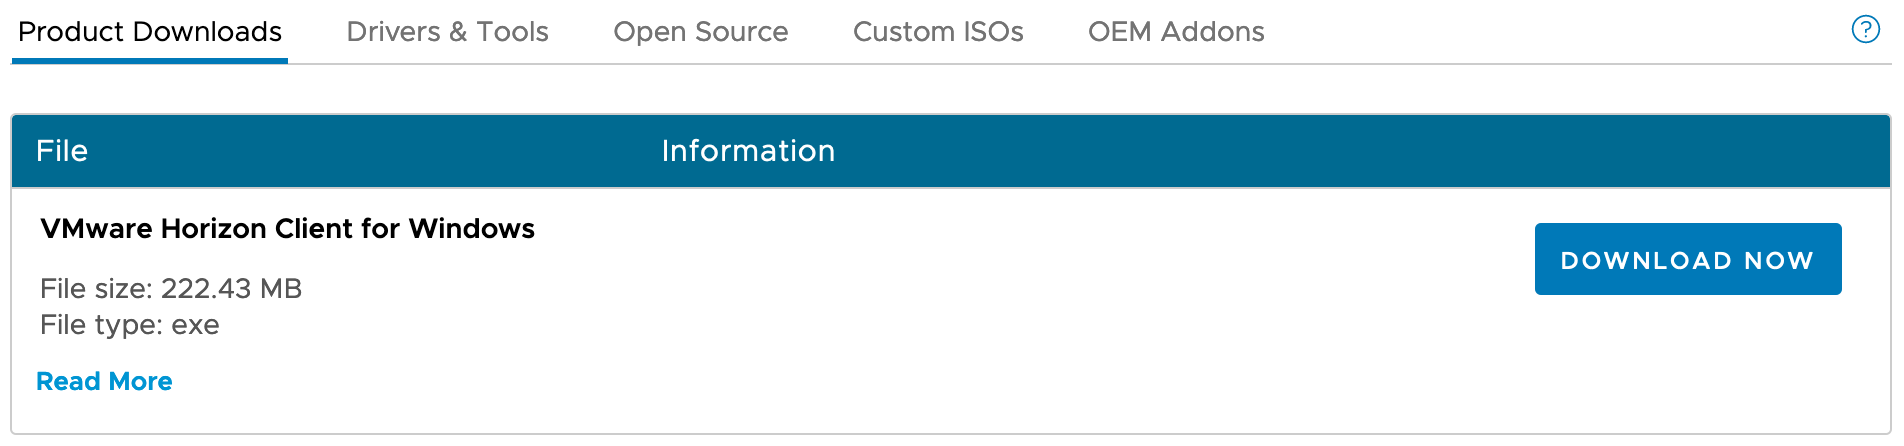
- Click the Go to downloads link for your specific operating system.

-
Donwload the software client.
-
Run the installer and follow the instructions. You must have admin rights to the machine to do this.
-
When the installation is complete, open the VMware Horizon Client.
-
Click + choose Add server and type in view.tsd.usit.no.
-
Log in to TSD with your username and password. The next time you open the VMware client, the server view.tsd.usit.no will be in the server list.
-
You may need to restart your computer.
On a UiO-operated, desktop computer
- Ask local IT to install the VMware client for you from the Application Catalog (SCCM).
- Follow steps 6 - 9 in the instructions for On Windows, Mac or Linux computers above.
OTP application for your smartphone
Install Google Authenticator on your phone. It is used for two-factor identification when logging in to TSD.
2. Getting access to a project
Before you can apply for access to a project, you must have the project code ready. You get the code from the person who gives you access to the project.
1: Go to https://selfservice.tsd.usit.no/ and click Apply for membership

2: You can then choose which electronic ID you want to use to log in. Once you have logged in, you will have the opportunity to apply for access - Apply for user account.
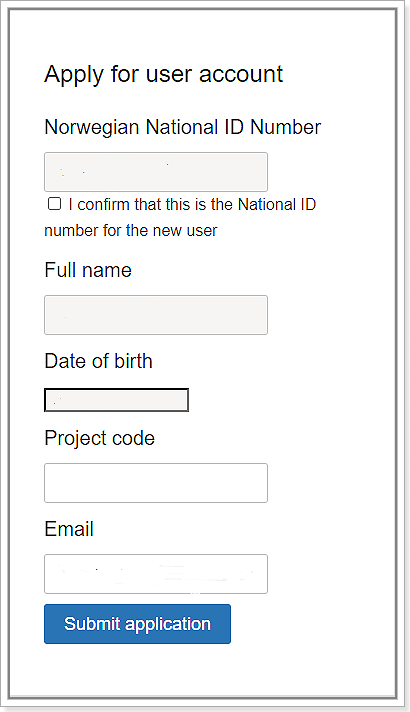
3: Fill in the fields and be sure to enter the correct project code in the Project code field. Press Submit application. You will now be asked to log in with Feide. Here you enter the username and password for the institution you are affiliated with.
To avoid delays, please inform the project PI about your application. When the project PI approves your application you will receive an email including your initial credentials (see next paragraph below).
To add international users who do not have Norwegian e-ID, the project admin must schedule a video meeting or phone call with the future user.
- Using TSD Self Service, the project admin requests that an invitation email be sent to the future user. The email contains an invitation link that the future user must follow. Notice that the invitation link will expire after 3 hours.
- During the video meeting or phone call, the project admin informs the future user about the secret string that was generated along with the invitation email.
- The future user follows the link received via email. Having been forward to TSD Self Service, the future user enters the secret string, thus creating their user account.
- After creating the user account, the new user sets up their password and generates a QR-code for Google Authenticator.
- Optionally, the project admin grants them access to one or more Microsoft Windows virtual machines of the project.
3. Receiving your initial login credentials
You will now receive an email with information about your TSD account. Here you will find your TSD username for the project you have been granted access to.
If you are a member of a TSD project and get access to another TSD project, you have to set a new password as per the instructions provided [here]. From this point onward, your new password will apply to all your TSD user accounts. Note that you do not need to get a new QR-code for your one-time code when you get access to a new TSD project.
4. Access to Windows VMs in your project
The Project Administrator manages the access to Windows Virtual Machines (VM) for Project Members.
5. Next step - Get OTP QR code
Return to the Selfservice Portal to both retrieve a QR code to use with Google Authenticator and set a password for your account. Start with Get QR Code for Google Authenticator.